Poor old PowerPoint, much maligned despite actually being pretty decent. Admittedly what PowerPoint WANTS you to do is a bad presentation, but if you ignore its promptings it can be a great communicatory tool.
Here are three techniques I use with images to help me make better slides.
Darkening Images
I use this technique a lot in my own slides, and indeed apply to making graphics, posters, thumbnails, and videos too. You take your desired picture (using pictures is good, relevant images help people learn) and then you reduce the brightness in PowerPoint in order to be able to write a relevant sentence or two on top. You retain the value of the picture, your words are clearly legible, and your slide looks extra stylish because it contains no filled (or semi-transparent) text boxes.
So here's a nice image, but it's too busy for text to be easily readable:

Here's the same thing darkened. To do this, right-click on the image and choose Format Picture, then find the Brightness and Contrast menu: this is in different places depending on which version of PowerPoint you're on. Then slide the Brightness slider to the left until you get a happy compromise between the picture being dark enough to write on in white, and light enough to still be easy to see and to work as a supporting image.
Like this:

I use this technique all the time in presentations and training materials, much of the time first showing the image in its orignal state then on the next slide the darkened version. Often I also use the Blur effect on the image to make the text even clearer against the background.
The Rule of Thirds
The Rule of Thirds is not something I'm very good at explaining, but it is something I find very interesting... It's around what makes an image particularly interesting or arresting, and I'll point you towards Ruth Jenkins' excellent blog post about it for a proper explanation.
A really short version is: images are most pleasing when the subjects are arranged on the (invisible) lines of division if you were to divide the space into thirds vertically and physically.
From a purely practical point of view, it relates to slides in that images which conform to the rule of thirds don't have anything in their dead centre. This is great for slides because it leaves a nice 'copy-space' for us to write in - whereas images where the subject is bang in the middle are really hard to use in presentations because there's nowhere convenient for the text to go.
So let's say you're talking about mobile phone use. The image in the darkening example above is a perfectly nice picture of a phone - but the focus of the image, the phone itself, is right in the middle of the frame. So our caption, though nicely readable against the darkened background, obscures the phone somewhat.
Here's another shot of the same person holding the same phone - this time the rule of thirds is applied. I've put in the division lines to make it clearer.

So the subjects are on the division lines - in this case, the lady holding the phone and the phone itself. Our slide is about mobile phone use so the photographer has done some of the work for us by putting the phone in focus and everything else not.
When we add our caption there's a natural space (again, on a vertical division line) to put the text.

So when picking out images for use in slides, you don't HAVE to think about the Rule of Thirds - but it certainly makes life easier if the subject isn't dead-centre in the picture.
Extending Images
Finally there's a technique which is a little bit more complicated but which allows you to manipulate images which you want to use but which aren't quite the right proportions for your slides.
Let's say you have a portrait image to fit into your landscape slide. You don't want to stretch the image because that will ruin it. If it's a busy image with a lot going on then it's best just to back-fill the rest of the slide with a block colour like black, white or grey, and write on that. But if the edge of your image is very simple - a picture of the sky for example - you can paste a second copy of your picture onto your slide, then use the crop tool to crop the second version to a tiny sliver of sky. Then you line up the sliver with the rest of your portrait-aligned picture, and stretch it to fill the slide completely. Your portrait image is now landscape.
In the example below I've used this technique to apply the Rule of Thirds to an image with a centred subject. Here's the original picture:
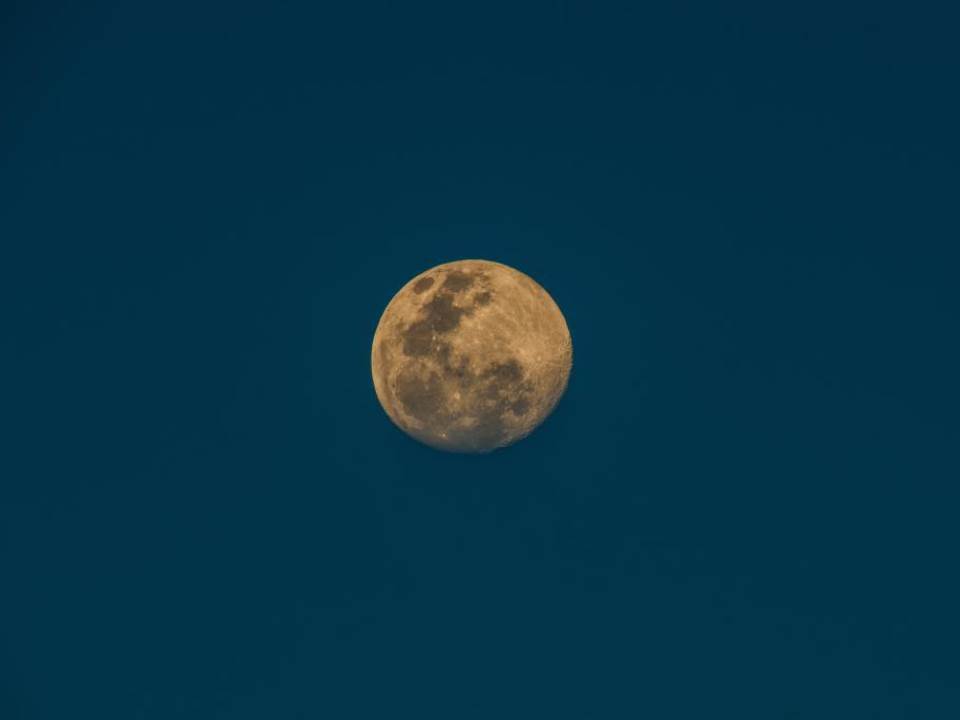
As you can see, the moon is bang in the middle, making it trickier to write anything big enough for people at the back of a lecture hall to read and still keep the slide looking coherent.
So we paste in the second version, crop, and stretch to extend:

Hopefully you'll agree this is literally seamless - you can't see the point at which the old image ends and the extended, cropped version begins.
I hope you can use one or more of the techniques above in your slides, and good luck!
All of the images used in these examples are Creative Commons Zero - they can be used, remixed, modified and so on without attribution. I sourced them via finda.photo.