Information Literacy

6 Useful Online Tools for Academics (and anyone else who teaches)


I teach a session on the PGCAP (Post-Graduate Certificate of Academic Practice) at York - a programme of teaching-related workshops and classes over the course of a year, which every new teaching academic has to attend.

Here's the presentation from this year's workshop, EdTech: Useful online tools for academics:

It covers Blogging and Twitter (specifically their possible use in teaching, which is a lot less straightforward than their use in research, or academic profile building), the excellent Padlet which people always seem glad to be introduced to, Prezi itself, Slideshare, and sources of copyright free or creative commons images.

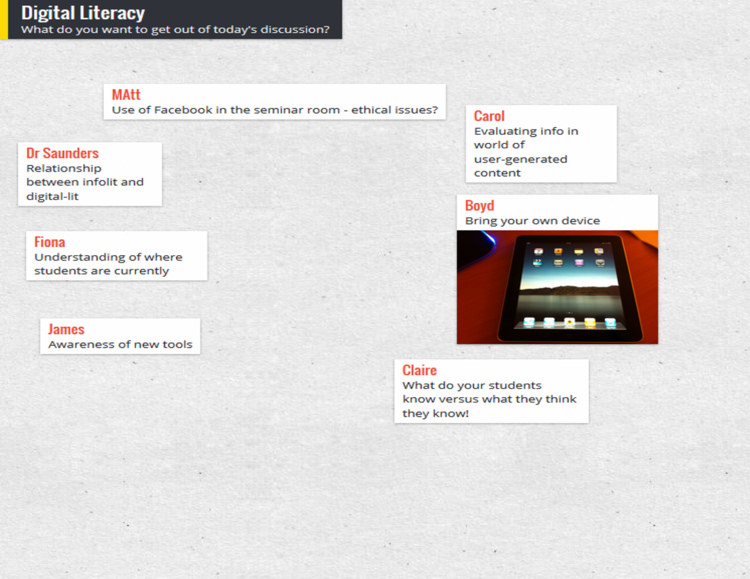
In previous years I've done a session on Information Literacy in the Digital Age - but I find it increasingly difficult to keep delivering the same things year after year. If I don't rewrite stuff, the feedback scores start to go down as I get less interested; clearly my declining interest is communicated to the audience somehow, despite my best efforts to prevent this. So last year when I had to submit the brief for them to put in the PGCAP brochure, I decided I'd redo the session and make it about useful online tools, and about trying to help the academics more digitally literate (rather than talk about student digital literacy) - that seemed to be the thing people enjoyed most about the previous version of the session, even though it was only a small element.

This academic year I've several times completely redone a workshop or teaching session, and stressed myself out massively in doing so, but ultimately felt much better delivering the new session and got better feedback too. It really is worth it. But it takes a huge amount of time and on this occasion I'd forgotten I'd need to do it - and the session was on the 3rd day back after Christmas... So it was a nightmare, really! But, ultimately, worth the time it took.

This kind of primer session on online tools is, in my experience, welcomed by academics. When asked about the most useful aspects of the session a lot of the feedback mentioned this, e.g.

  • Opened my eyes to new technologies and avenues to share teaching content.
  • Use of blogs images, twitter…all.   I had heard of many of these but the info was helpful to know how to use them effectively.

  • Seeing what is available, evaluated by presenter – gave good insight

  • Very objective analysis of tools and possible use..

  • Examples of how the tools had been used for teaching and learning

So something as simple as flagging up tools some may not have heard of, and giving examples and (objective, rather than evangelical) analysis of how they're used so that even those who have heard of them get something out of it, is often enough to be genuinely useful.

This is less and less of the case, however. I was talking with someone from the eLearning Team (not part of the Library or IT) this week and we agreed that a couple of years ago, just introducing these technologies to a group of academics was enough - but now there's much more understanding of the tools that are out there. So we have to up our game, and move onto more in-depth discussion of how to use these tools, rather than just what they are. Increasingly (albeit not in the presentation above) I find myself wanting to present things by user need, rather than by platform.

The 4 Most Important PowerPoint Rules for Successful Presentations


I have been working on these slides, 10 minutes at time here, 15 minutes there, for MONTHS! I finally uploaded them to Slideshare this morning.

There are a few reasons for making these. First of all it's separating out what is essential in slide design, to what is merely desirable. There's a million and one guides to creating nice PowerPoint slides and a lot of them focus on what is desirable, but that can often be too much information if you want to improve your presentation materials but you're not sure where to start. The presentation below focuses on the four rules which REALLY matter (backed up by actual research) - and as it says in the slides, an attractive presentation is actually just a byproduct of an effective presentation. Follow the four rules below and you will be making effective PowerPoint slides which communicate effectively and make your message stick.

Another reason to make these is my understanding of what matters with slide design is evolving over time, so this reframes some of the things I've highlighted in previous presentations. It covers some of what we talk about in my Presentation Skills Training; I realise not everyone who wants to attend these can get to them, so wanted to disseminate some of the guidance they contain more widely. (If you're already booked onto a workshop don't worry though - the information above is a small part of the full content of the day!) 

I hope people find these useful. In my experience the easiest way to make a big difference to how effective your presentations are is to start with the materials (for teaching as well as conference presentations) - a great set of slides makes the audience sit up and take notice, which in turn gives you the confidence to deliver a better presentation.

If you'd rather use a design tool to help craft your slides for you, check out Canva and Haiku Deck from Presentation Tools Week.

Digital Scholarship Training at @UniofYork: Facts and Figures


Andy Priestner has written about the importance of writing reports, even if no one asks you to, to showcase the value of what the Library is doing.

...it is not enough just to collate this data and wait to be asked for it. It is far better to ensure that the people who need to know this stuff are informed, at least once a year, of these top level statistics, before they ask for them: a pre-emptive strike if you like…
— Andy Priestner in Business School Libraries in the 21st Century, edited by Tim Wales

(You can read a larger excerpt from his chapter here.)

With that in mind, a while ago I produced an internal report on the Digital Scholarship Training I've run at York (and various exciting things happened as a result of doing this) - which I've now expanded into an external version, which includes the Google Apps for Education training run by my colleagues.

My message to you is that if you have any expertise in the area of digital scholarship, scholarly comms, Web 2.0 in HE etc, find a way to offer it to your academic community! As I've mentioned before, we've found they're ready for it, and excited about the opportunities.

Below is a tweaked version of the report to include the message in the paragraph above - the original version (which can be found on our Library slideshare page) is aimed at York staff and asks them to get in touch for information about upcoming events. Putting it on our Slideshare page will hopefully increase the profile of something very positive for the Library and IT - we've both found that there's been some reputational gain from helping people out with things they really value right now, rather than solely focusing on what we've always done. We've also both found that word is starting to spread and we're becoming go-to people within the University when help or advice is required in these areas, which is excellent.

There's more about the nature of the training itself in this blog post on the Networked Researcher suite of workshops, and this later post about how the training is shifting slightly.

10 Tiny Tips for Trainers & Teachers


I do a whole load of training these days, both as part of my day-job and my freelance work, so have picked up a few small tricks along the way. There's nothing earth-shattering here - but if you run training or teach infolit classes, you may find some of these useful.  

Here's the short, visual version - then I go into each one in a bit more detail below.

Session structure

1. Start with something practical. Sometimes there is, unavoidably, a bunch of theory or conceptual stuff you have to get through. But if that's the case, if at all possible make this second on your itinerary for the day / hour - and start off with something practical. Diving in with something for people to DO wakes everyone up, and grounds the whole workshop in something tangible rather than abstract. It also makes everyone into active participants early on.

2. Allow time to recharge. A full-day workshop should have coffee-breaks etc built-in, but even a 1hr workshop can be quite overwhelming. Just building in a 3 minute gap for participants to switch-off, chat to each other, relax, will help them focus for the second half of the session and raise the energy level all round. A break 10 minutes in to a 1hr session works brilliantly - surprisingly better then, than half-way through the session or later.

3. Sum up via a Random Slide Challenge (also known as Battle Decks). I love a random slide challenge. Here's how it works:

  1. You create a short simple slide-deck which summarises the session you've just run (I normally create two decks of 5 slides each)
  2. You get participants to deliver the presentation (so in my case, two volunteers)
  3. The volunteers have never seen the slides before, which is part of the fun - so they see each slide for the first time at the same moment the audience does, and have to improvise their presentation based on that
  4. You move the slides along after 15 seconds per slide, so the whole thing takes only just over a minute per presentation

You have to give them the best possible chance of knowing which part of the session each slide is getting at! If you look at slide 41 onwards of the deck embedded here, you'll see an example of a random-slide challenge set of slides.

This works well for two reasons - firstly it is often hilarious. People in the audience shout-out if they pick up on what the slide is about before the presenters, and basically it leaves everyone on a high at the end of the session. Feedback forms at both the British Library, where I've done this on training courses, and for my infolit classes at York, often point towards this as being one of the delegates' favourite parts. The other reason it works is it's often a surpisingly great summary of the session. People say the exact kinds of things I would have said if I was summarising myself, but it has more impact because it's another voice (and, with students, it's one of their peers). Try it! The only thing is, you need a plan B for if you get no volunteers, which once happened to me. Prizes help ensure this doesn't happen...

4. Close after the questions. It's good to end any training or teaching session with a call to action - a clear message as to where participants can go from here. This can be somewhat muddied by a Q&A session (which can of course throw up anything), so build in time for questions just before the end, and leave yourself the last 5 minutes to close the session with something direct and meaningful.


Tablet as teaching assistant

5. Use Padlet on your tablet to remember who's who. Padlet is a great tool that can be used in all sorts of ways. You create an online wall, onto which you and anyone else who has the URL can post notes. Anyone can double-click anywhere to add a sort of virtual post-it. Then they can put in their name as the title, and a note, or a URL - links to pics or videos become embedded objects on the wall. I use it to crowd-source people's ideas in training sessions - like you'd use a flipchart, except everyone can go back and look at the URL after the session, and it becomes a sort of archive for everyone to learn from oneanother.

Anyway, depending on the session I'll go round at the start and ask people to introduce themselves, and say what they want to get out of the day / hour. This is very useful in and of itself, as you can tailor things accordingly. I'll type it into Padlet on the big presenting screen as I go, so we can all refer back to it later in the day and see if we did what we said we'd do! But the really useful thing is, you can choose exactly where your notes go on the screen - so I put the notes in a way which corresponds to the physical layout in the room and where people are sitting, like in the example below. Then when I take it off the big-screen to put my slides up, I put the Padlet wall on my ipad screen - this means I've got everyone's names in the right place for easy reference so I can remember who's who!

(I feel like I didn't explain that very well. Does that make sense? The example below should clear it up.)

A Padlet wall example

A Padlet wall example


6. Skip ahead in the presentation, on your tablet. I like to have my slides or prezi open on my ipad so I can see what's coming. This is particularly handy if you're joint-teaching with somone - while they're speaking, you can recap what you're supposed to be saying next. A massive part of successful teaching and presenting, for me, is feeling in control - and this helps.


Handouts

7. Hand out the handouts. It's tempting to feel more organised by distributing the handouts, if you use them, before people arrive. Placing one by each PC or on every table. But if the group is of 20 or less, hand them round yourself; it's a great opportunity to meet each person individually and make eye-contact which, however brief, makes the communication easier and fuller for the session proper.

8. Use screengrabs to make exercises easy to find. It's amazing how often people lose their place in a handout. When you get to an excercise in the handout, put a screengrab of the slide that's on the big-screen at the time you're introducing the excercise - it makes it quick and easy for people to know exactly where they should be.


Materials

9. Use a free PBworks wiki to store materials for delegates. For all sorts of reasons, it's good to have materials online. Particularly if your session is link-heavy, store a digital copy of the hand-out on a free wiki (PBworks for example) so delegates can access them that way and just click on URLs rather than typing them in. Put the PowerPoint on there too - this means you’ll have a copy of your presentation and hand-outs even if your USB stick falls out of your pocket and your printer breaks…

10. Send the presentation round afterwards with an email. A follow-up email is useful for reinforcing key messages, and making sure people have access to the presentation materials. Don’t rely on people (students especially) tracking it down for themselves; follow up directly, ensuring they have a copy of the presentation AND your contact details. If there are issues around attachment filesizes, upload your slides to Slideshare and your hand-out to Scribd, and include links instead.


As always, I'd welcome comments - add your own tips below and help make this post more useful!

Steal this: Student Guide to Social Media

If you click the image below, you'll be taken to the Student Guide to Social Media. This is an interactive online resource, giving information on various social media platforms, and on tasks you can accomplish using social media - it is aimed primarily at undergraduates but has applications across the board. It is made available under a BY-NC-ND Creative Commons licence: in other words if you think this resource might be of use to YOUR students, feel free to use this, link to this, make it part of your own institution's website, just as long as you credit the creators (the BY part), aren't using it for commercial purposes (the NC part) and use it entirely as it is, in its current state, rather than creating your own version or derivatives (the ND part).

A screenshot of the resource's homepage


Alternatively, book mark libassets.manchester.ac.uk/social-media-guide/ or click the link to open the resource in a new window.

A Northern collaboration

The resource is the result of a joint project between the Libraries of the Universities of Leeds, Manchester and York, developed over the Summer. Michelle Schneider from Leeds' very successful Skills@Library team approached me about working together on a social media resource for undergraduates - I was extremely pleased she did, because it was something on my list to do anyway.

There's a lot of support out there for postgrads, academics, researchers generally in using social media, but I don't think there's as much for undergraduates. It's an area we're looking to expand at my own institution, and as well as face-to-face workshops I really wanted something that worked as an interactive learning object online, probably made using Articulate / Storyline. Imagine how pleased I was, therefore, when Michelle told me the other collaborators would be Manchester, including Jade Kelsall, who is absolutely brilliant with Articulate! I'd worked with Jade before at Leeds; she provided all the technical expertise to create the Digitisation Toolkit (using the Articulate), one of the parts of the LIFE-Share project I actually enjoyed. Also on the team were Carla Harwood at Leeds, and Sam Aston at Manchester.

So we got together, brainstormed on lots of massive pieces of paper, photographed the paper with our ipads, emailed each other a lot, and came up with a resource which we think will be really useful. I feel quite bad because I was off on paternity leave for a month of this and it took me ages to get back up to speed, so I don't feel like I contributed enough compared to Jade and Michelle who worked tirelessly on this (sorry guys!) but I'm really pleased with the result. It's gone down very well on Twitter, and I was excited to see we've found our way onto a curriculum already:


How it works

Increasingly as I do more and more teaching, training, and planning, I'm aware that when introducing people to new tools (or trying to help people use existing tools better) you have to give them two different versions of the same core information. The first and obvious thing is how to use a tool - e.g. here's Twitter, here's how you create an account, here's some tips on using it. But this assumes some prior knowledge - what if you don't know why you'd need Twitter? So you also have to present the information in terms of tasks people want to achieve: "I want to boost my professional reputation" is one such task, and Twitter would be among the tools you might recommend to achieve this. The great thing about using Storyline is we can do exactly that - students can explore this resource by tool, or by task, or both.

We've also included case studies (some video, some not) and I'm indebted to my colleague in the Career's Service at York, Chris Millson, for providing a lot of really useful information about both tools and tasks and sourcing case studies...

The resource is, deliberately, very straightforward. We stripped out everything non-essential to give students easily digestible, bite-sized introductions to the various things they might want to use these tools for (Twitter, Facebook, LinkedIn, Slideshare, Google+, Academia.edu, blogs etc). It's also relatively informal without attempting to be in any way cool or streetwise. I've showed it to some of my students in info skills classes already and it's gone down very positively; I think even students who are very au fait with web 2.0 tools still appreciate some guidance on how to meld the social with the academic and the professional.

So, check out the Students Guide to Social Media, tell us what you think, and if you'd like to steal it, feel free.