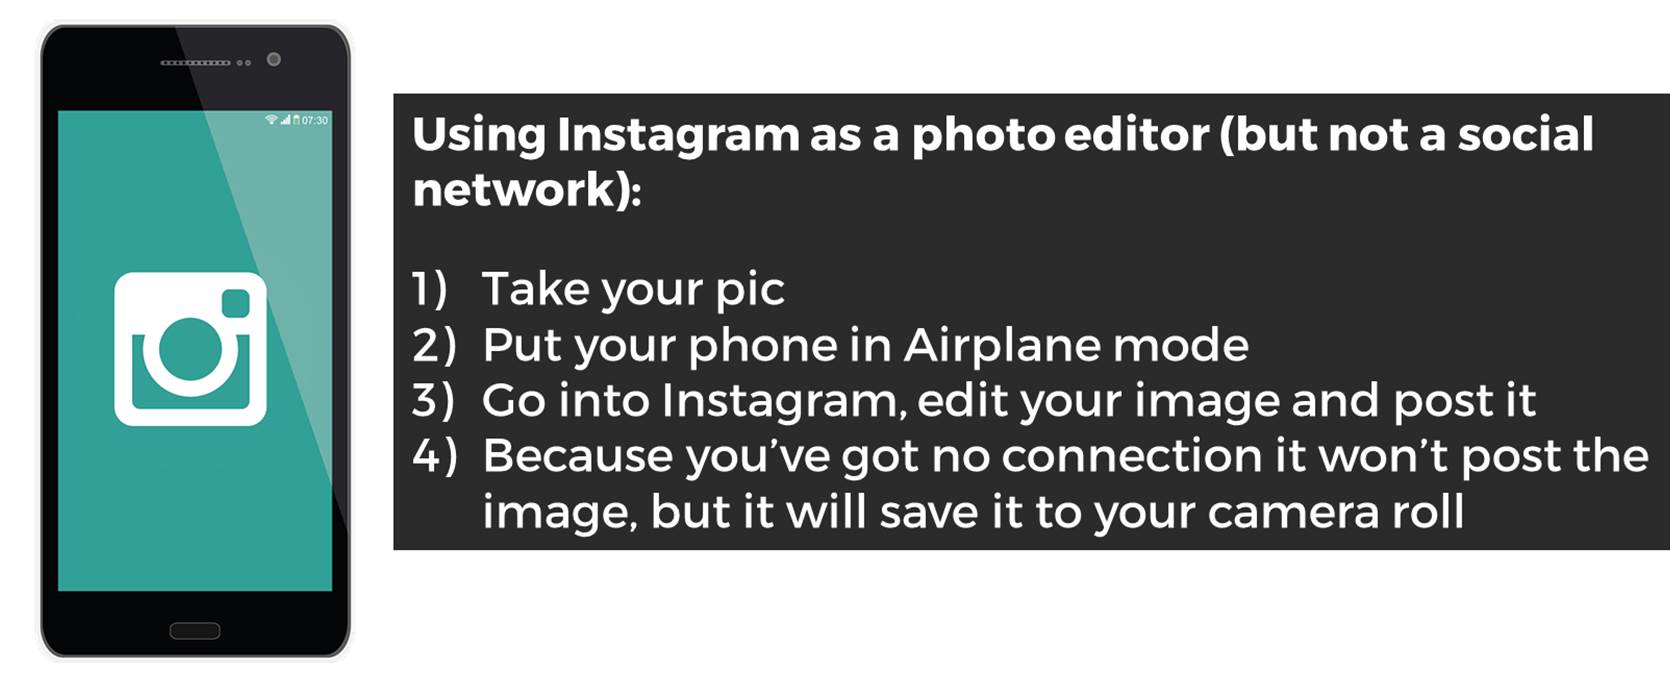
As well as being a massively popular social network, Instagram is a brilliant photo editing tool - it's quick, intuitive and easy to transform images. But you can't save the photos to your phone unless you post them online, and sometimes you might want to edit a photo and not share it with the world on social media.
So how do you do this? The tl;dr version of this post:
This is great for family stuff (and professional stuff, more on which below). I've become a little obsessed with manipulating photos so that the most important part of the image is clearly highlighted in some way. For example this weekend I took a picture of my daughter and wanted to use the filters Instagram provides and also the tilt-shift function. I love tilt-shift - it makes part of your image slightly out of focus, drawing the eye to the in-focus part you define. But I didn't want to post a picture of my kids on Instagram because I use that purely for drumming related shenanigans - so I took the picture and went into Instagram, edited it, and posted in Airplane Mode so it didn't actually get as far as the internet, but DID save to my camera roll. I really like the way the bits in the picture frame are in focus, but the resit isn't.
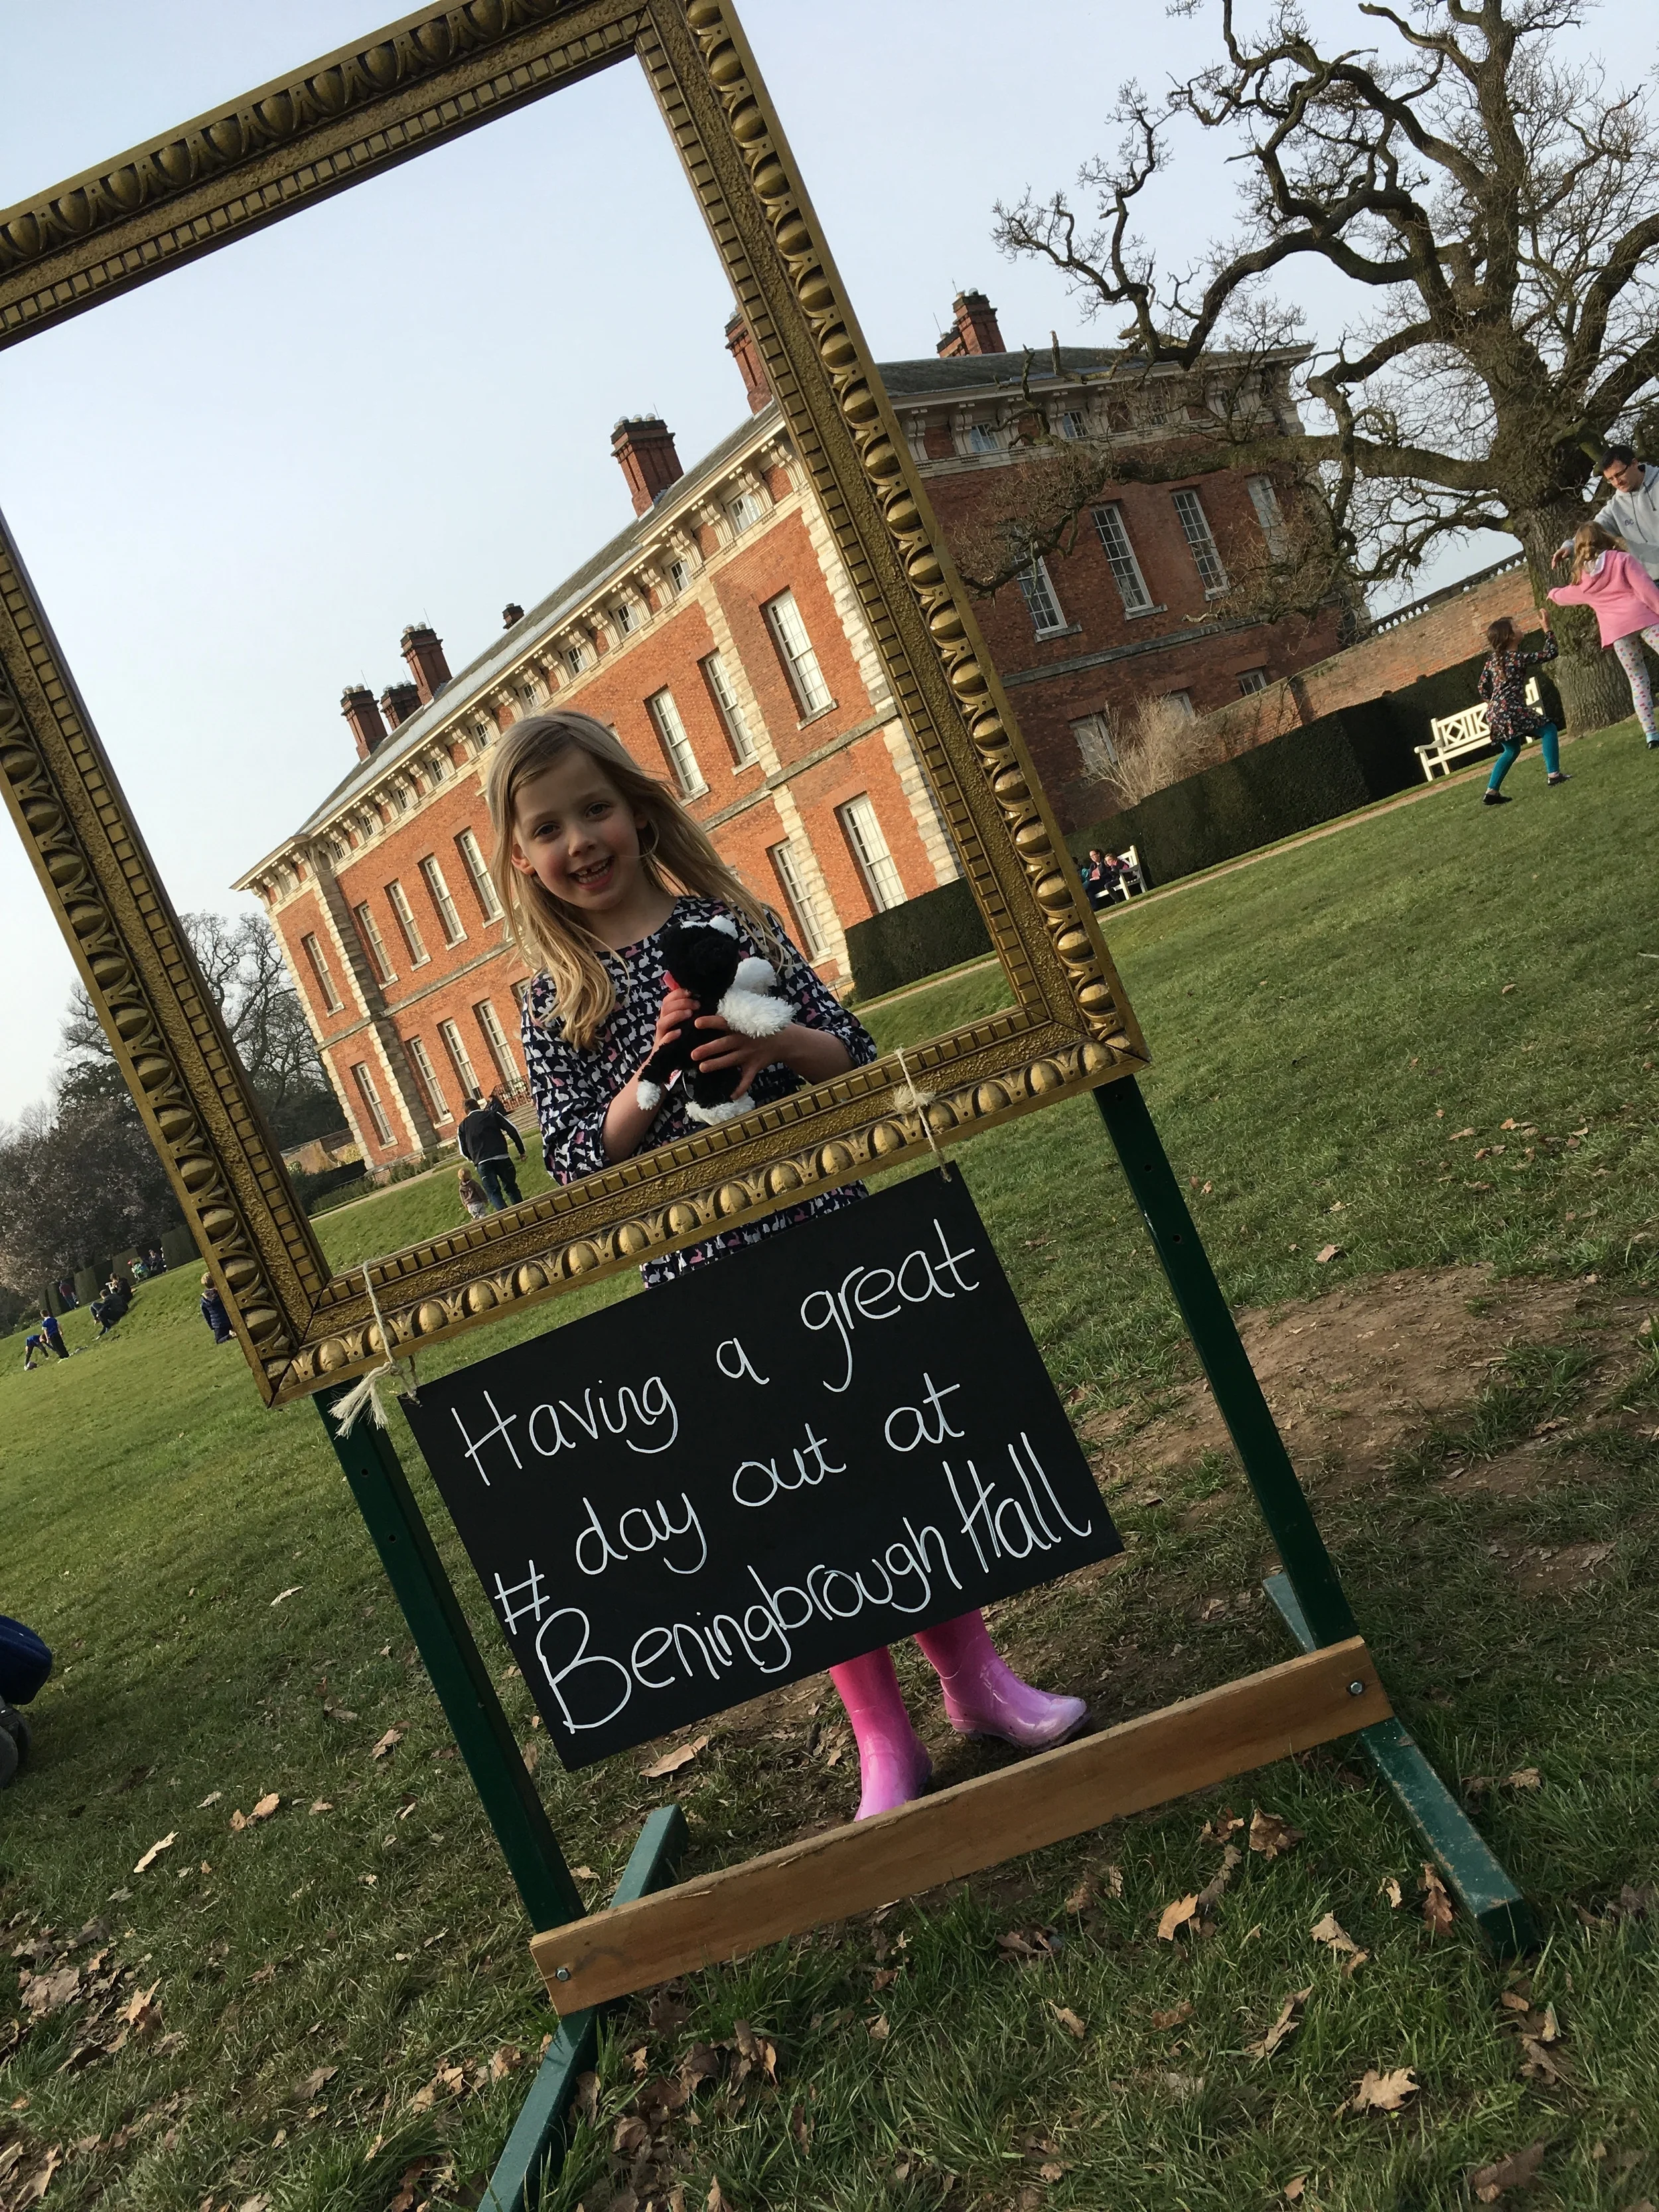
The original picture
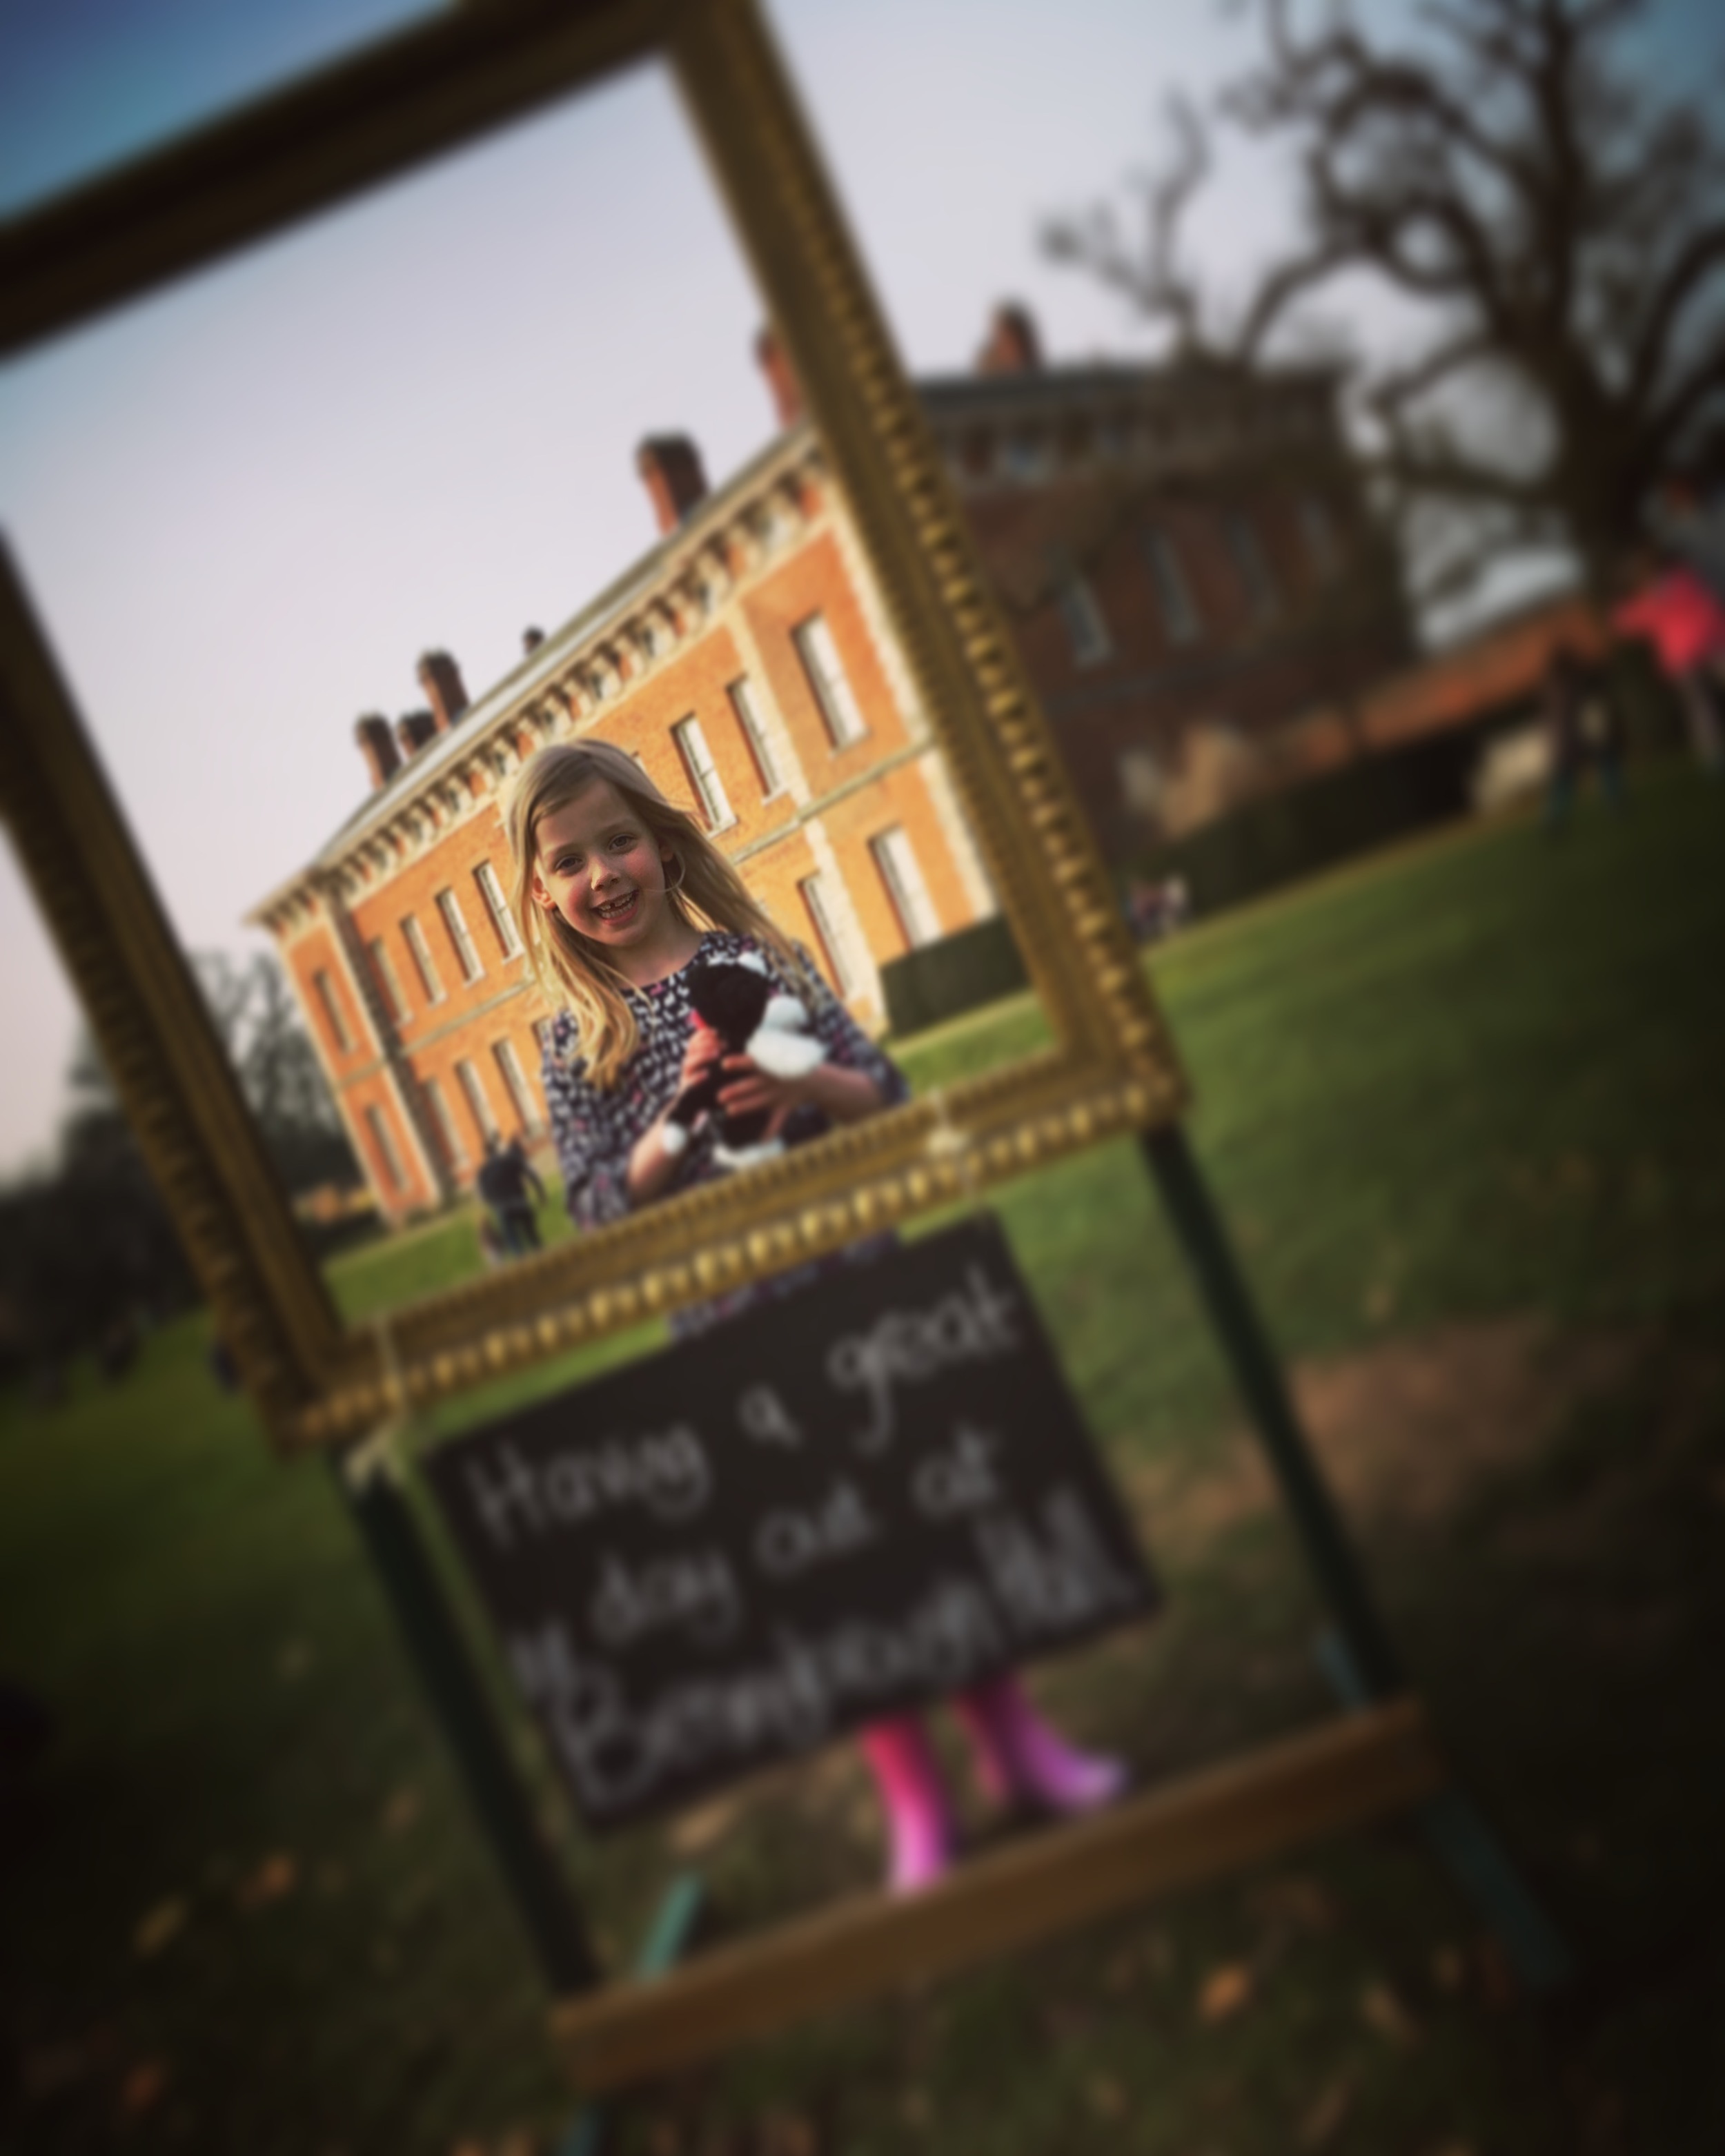
The tilt-shifted, Instagram filtered one
5 steps to use Instagram professionally for photo editing
For professional projects this is potentially very useful, especially if you can't find a free stock image that suits your requirements. Let's say you're making a slide for a presentation and you need to talk about Google. You don't want to pay for a photo, and you can't find a suitable Google-related pic which has space to write on, without having to pay.
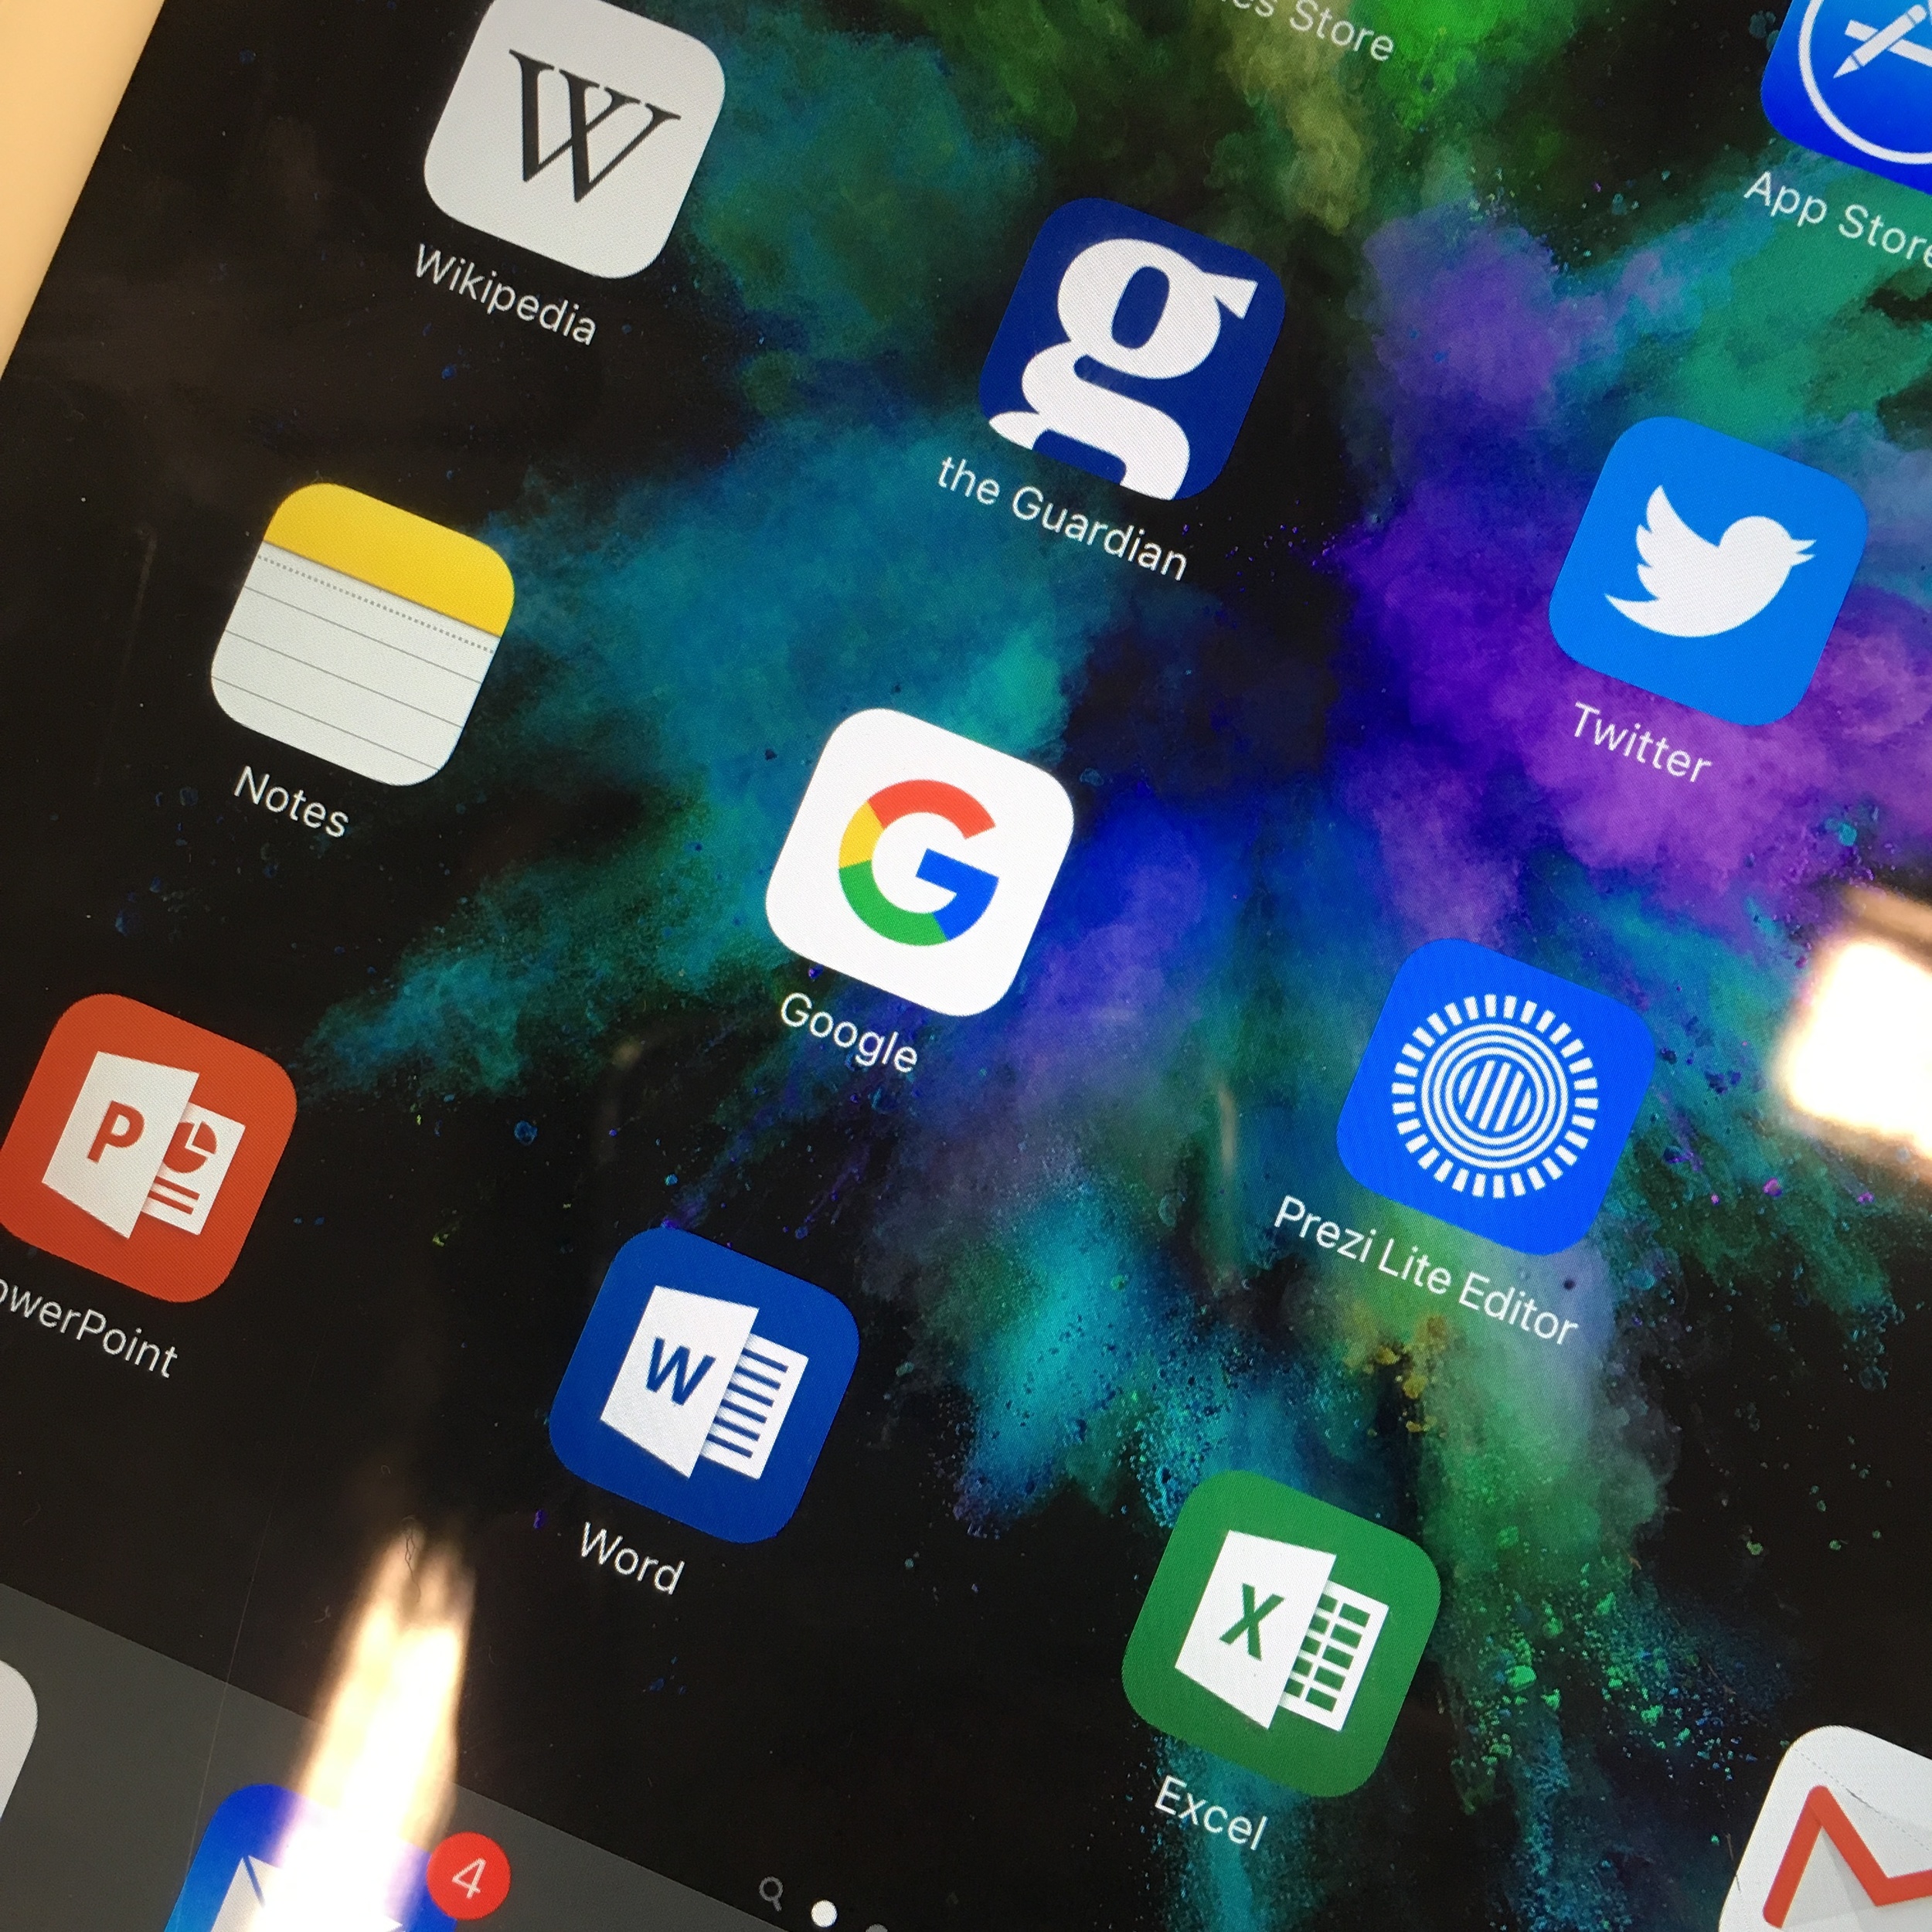
STEP 1: Use your phone to take a picture of the Google app icon on a tablet. (Keep in mind you don't have to take a photo - you could screengrab your phone or tablet if you want to get an image of an app or website. I've gone with a photo in this example to get the angle.)

STEP 2: Apply a filter. (I ended up choosing X-PRO II)

STEP 3: Use the Radial Tilt-Shift to effectively blur everything except the Google icon

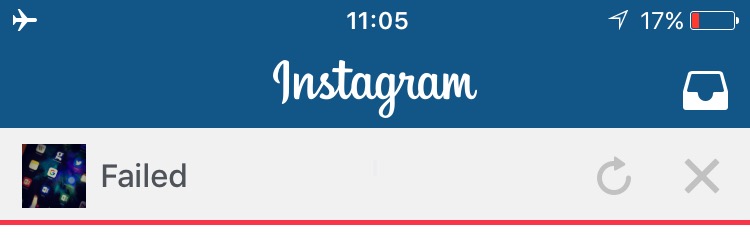
STEP 4: If you don't post it to Instagram it won't save to your Camara Roll. So go into Airplane Mode then post it - you'll see the 'Failed' message and you can press the X to dismiss it. Instagram will now forget all about the image and not attempt to repost it when you have connectivity - but you'll still have the edited pic saved to your phone.
STEP 5: Your finished photo! The eye is drawn to the Google icon, and the photo is darkened and blurred so you can potentially add easily readable white text to your image as part of a slide. Email it to yourself and it's ready to use in your slide.

Finally here are the two photos side by side so you can see the difference.
Original photo

Edited version
You can sign up to Instagram and never publically post a picture if you don't want to! If you make creative use of this technique let me know in a comment.